
What is required for the SSO configuration process?
This is a paid addition, make sure your organisation has purchased SSO config.
The steps required for setting up SSO must be completed at least 2 weeks prior to your Sonder launch date.
These are the key details required for the integration:
|
Sonder |
|
|
Federation Server |
|
|
SSO Protocol |
|
|
Endpoint URL |
|
|
Entity ID |
urn:amazon:cognito:sp:ap-southeast-2_Gk0YLtEoy |
|
Logout Binding |
HTTP-Redirect |
|
Logout URI |
sonder://sso/logout |
|
Binding |
POST |
Please ensure that email addresses uploaded into the Sonder data portal use the domains provided in the SSO claims. If you’re unsure, please check with your IT team
The following is an example SSO Configuration using Microsoft Entra ID (formerly Azure Active Directory) and is purely used for demonstration purposes. If you have a different SSO provider, you will need to use that provider's instructions for SSO configuration.
STEP 1. Create a new application
Click Enterprise applications under Applications on the left menu:
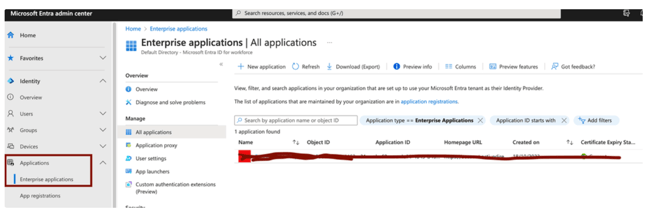
Click New application: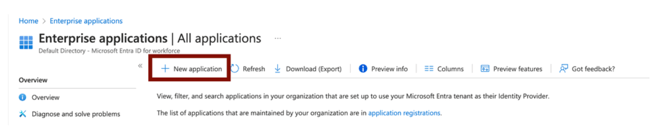
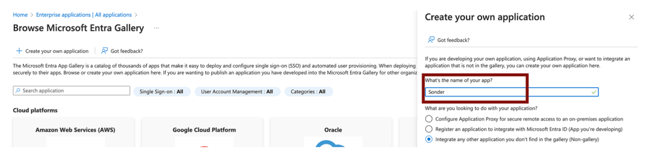
Click Create your own application: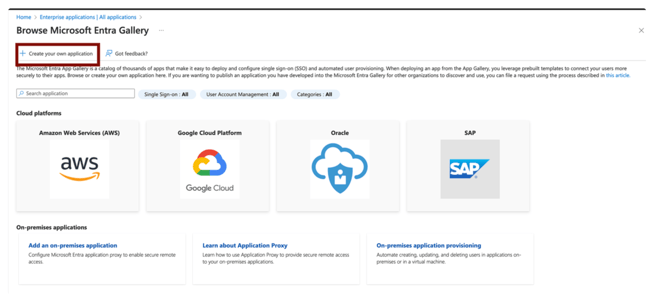 Input the app name, e.g. Sonder, then click Create:
STEP 2: Configure SAML
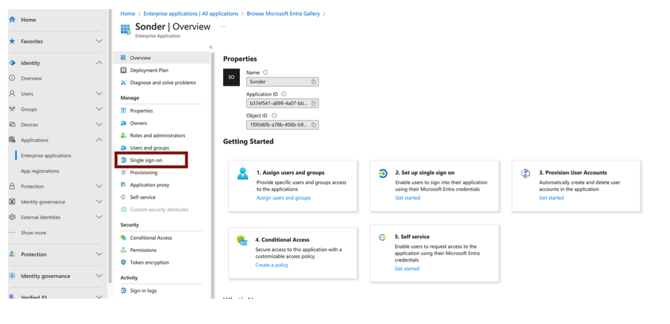
Click Single sign-on in the Sonder application:
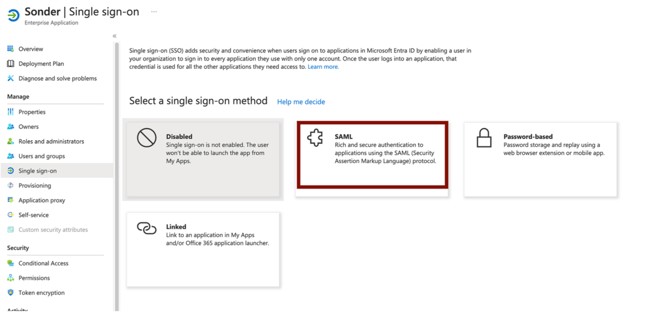
Click SAML:
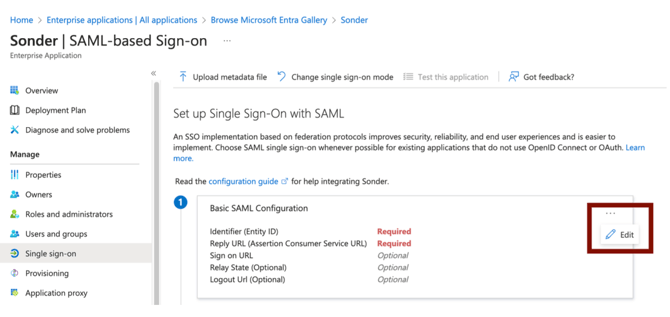
Edit Basic SAML Configuration:
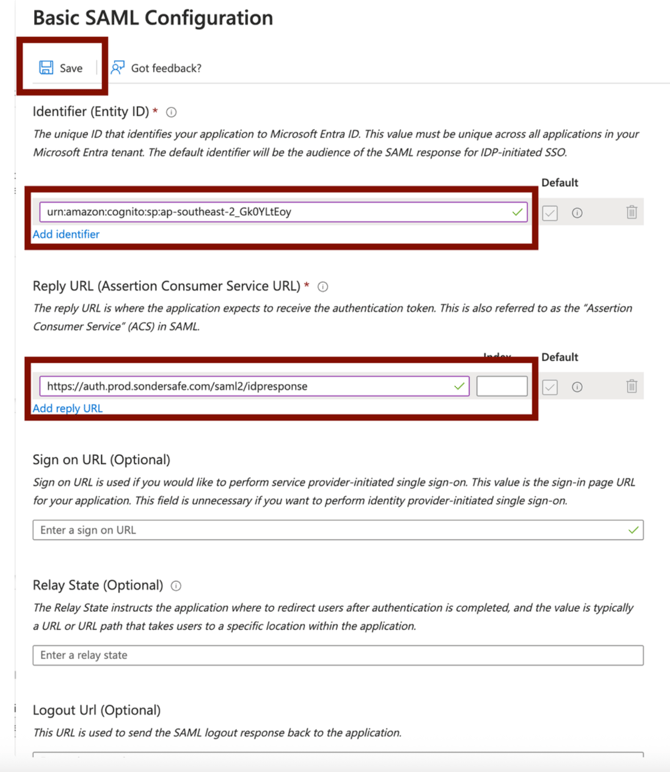
Add Identifier and input the Entity ID, add the Endpoint URL / Reply URL and input the reply URL, then Save.
Note: the Entity ID and reply URL are the information Sonder gives to the customer.
Edit Attributes & Claims(Optional):
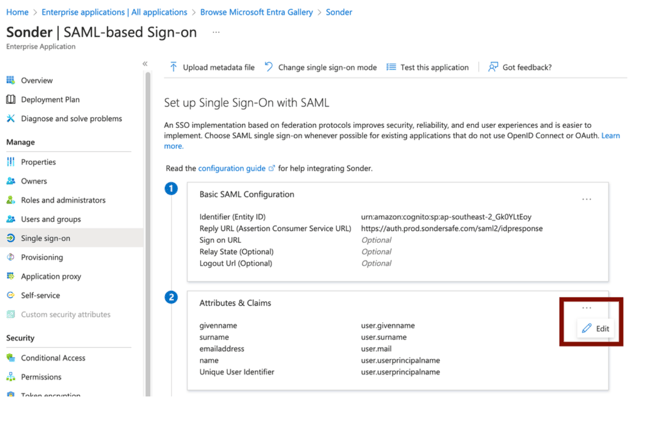
In the Additional Claims section, Sonder requires email, givenname and surname for SSO Configuration. You do not need to change anything unless you want to change the Value column, e.g. change user.surname to user.sn if you have surname populated in the user.sn field instead of user.surname in your system.
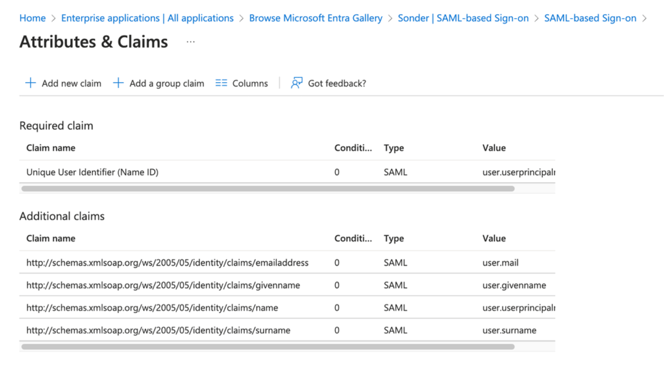
STEP 3: Collect & share the configuration information Sonder needs
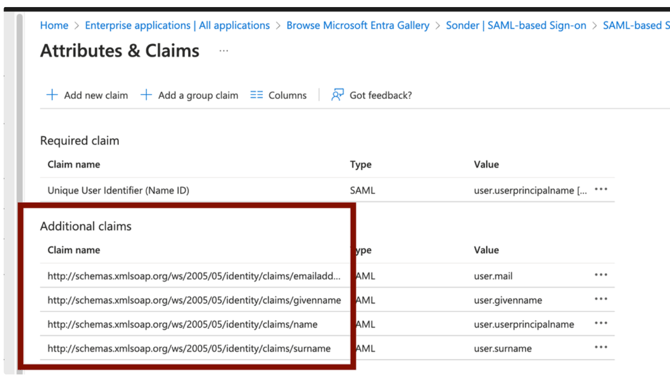
You are required to share Metadata URL and Attributes with Sonder. Please use the accompanying PDF titled SSO Configuration - Customer to complete and share with your Customer Success Manager or Sonder Implementation Manager when complete.
Screenshots below show where to locate this information.
1. Metadata url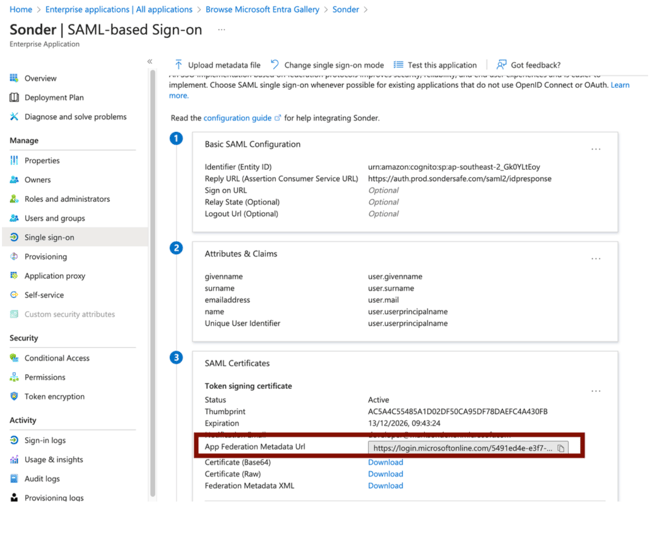
STEP 4: Sonder configuration steps & SSO Login Test Meeting
Once Sonder has received the completed SSO Configuration - Customer to Complete document, we will configure SSO on our platform and notify your team once this is complete. At that point, your team will conduct SSO Login Testing to ensure the experience is functioning correctly.
Sonder recommends your SSO Login test group include 4-6 employees (including your Sonder project team members and IT contact), plus a combination of iOS and Android phone users if possible.
Prior to SSO Login Testing, ensure that the test Users/Group have been added to the Sonder application group so they can log in to the app during testing.
Your Customer Success Manager or Sonder Implementation Manager is available to answer any questions your team may have during this process.
NOTE: The SSO integration will not work until Sonder has configured our side of the SSO bridge. Please do not try to login to the Sonder app prior to this meeting as you will see the incorrect login experience.
Things to make sure before testing:
1. Confirmation from Sonder that the SSO setup on Sonder's end is completed.
2. Test users are added to the SSO app group in your IDP environment.
3. Test user details have been added in the Sonder Customer Portal.
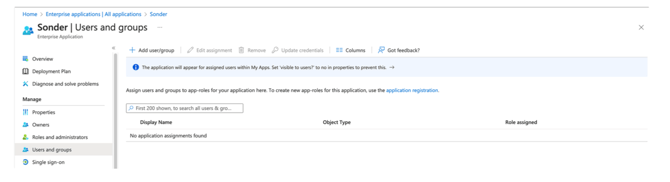
STEP 5: Add Users/Groups so your people can access Sonder at launch:
Once login testing is complete, ensure all applicable Users or Groups are added to the Sonder application so that your people can access the Sonder mobile app at launch.
Common Issues:
"Required String parameter 'Relay State' is not present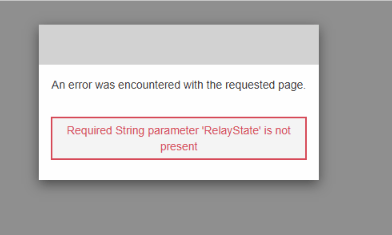
"Your administrator has configured the application Sonder to block users unless they are..."
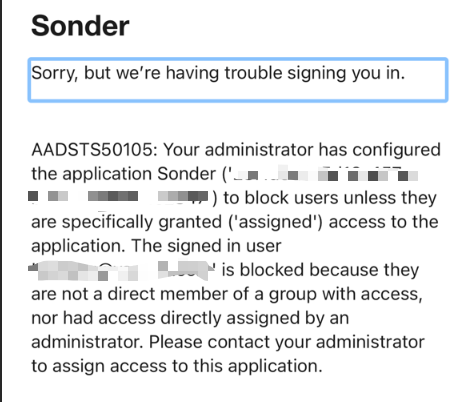
This means that the user attempting to log in has not been added to the SSO app group in Entra. Please ensure that the test use has been add to the SSO app in your entra instance.
If you are receiving an 'Action Blocked' error when using MDM devices, the action to rectify this is the following; exempt com.sonder.member.android
Please reach out to customer.support@sonder.io if you have any other issues or concerns. When contacting support, including a raw SAML assertion from the failed login instance helps us get to the bottom of the issue much faster. For easier assertion collection, feel free to use our web login designed for SSO testing at members.sonder.io.